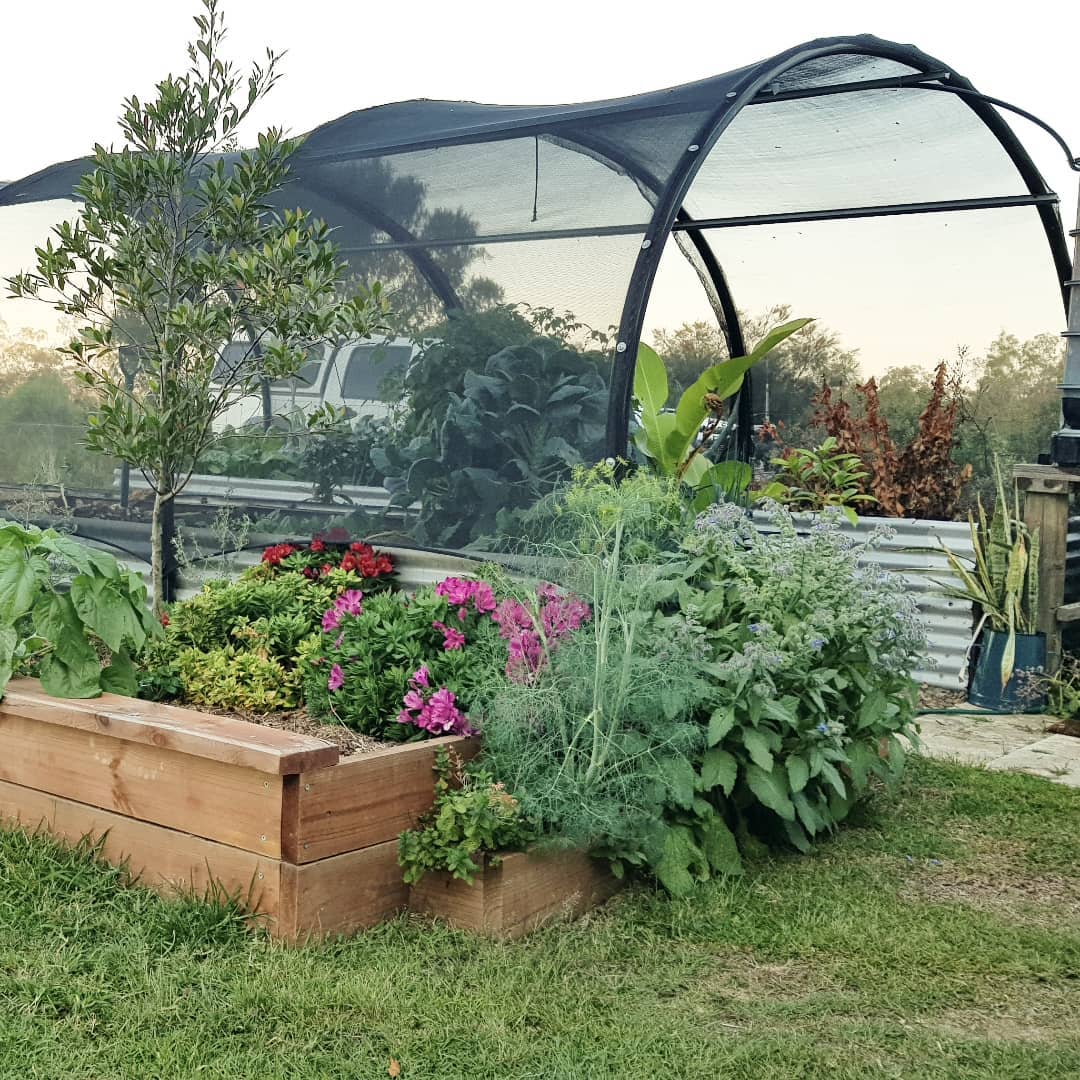
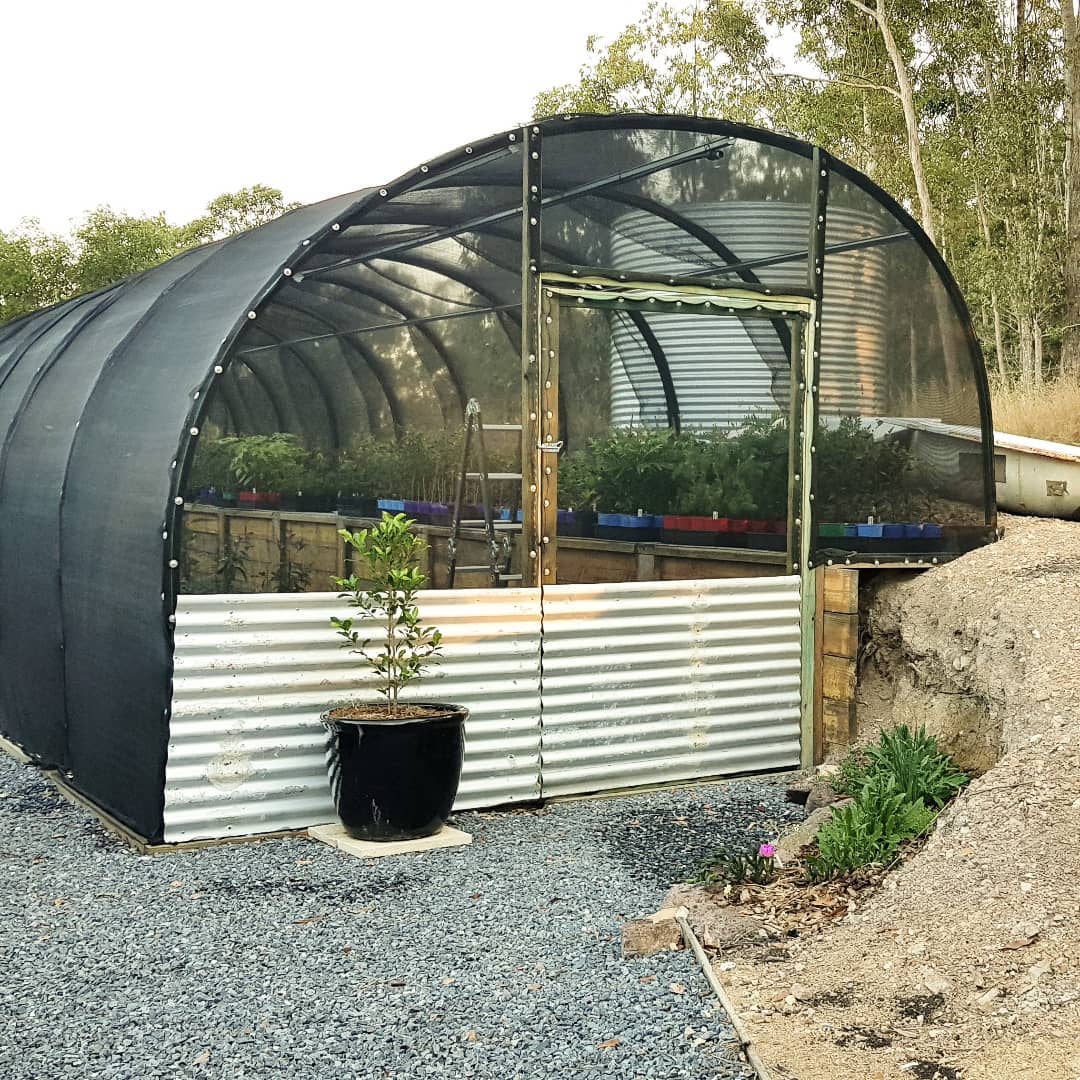
The one thing I get asked about most are our green houses. Where did they come from? Who built them? How much did they cost?
How To Build A Hoop House.
They’re called hoop houses and when built correctly, they’re a fantastic way to provide shade and protection to your veggie gardens. Built incorrectly and they’ll flatten like a pancake and end up being useless. We actually built them ourselves. They’re a very simple concept that 2 people can throw together fairly quickly.
I’m going to explain the basic concept here, and will be putting together a step-by-step guide that you can download, print out and follow yourself.
What is a hoop house?
They’re essentially long lengths of high pressure irrigation pipe, slid over star pickets with metal strapping to reinforce each “hoop” and finally a layer of shade cloth over the top.
There’s so many variations once you have the basic structure.

We built mine over our raised vegetable beds so we’ve left both ends open to allow the bee’s to get in there and do their all important pollination. The purpose of mine is to provide shade from our scorching Kandanga summers and to help protect from those winter frosts that we actually haven’t had up on the hill for a few years. The garden beds on both outside edges provide more protection by helping regulate the temperature of the growing boxes.
The one we built for Chris is for him to raise his natives and fruit trees in which are then planted on the property. Because we live in a fairly harsh climate, most of the plants he buys as tube stock or propagates himself needs some serious protection during those early months to ensure they survive. Because he also uses yummy, stinky organic fertiliser on them, we needed to close in both ends to keep our the rabbits, wallabies, possums and koala’s. Cypress also loves to use trees as Ninja Turtle bases so we installed locks on the door that he can’t reach for at least another 10 years.
Do you need to prepare the ground with earthworks?
Not if you don’t want it. The amazing way about building using this method is that both sides of your structure don’t have to be level.
The one we built for Chris’s is a perfect example of how adaptable these things are. We needed to build his somewhere with as much shelter and shade as possible. We also knew after years of both of us working in the nursery industry, that we needed the bench to be the right height for him so he’s not bending over an awkward height bench when potting or weeding.
We really wanted to build his out the back of the shed house where it would be morning shade from the shed and afternoon shade form the gum trees in the bush behind us. There was a narrow pad already for out water tanks and then a tall bank so we knew we needed to build a retaining wall. Chris worked out that he could actually use the retaining wall as his bench and it would be the perfect height. IT was also going to give him much more growing room.
So in his case – yes we did get earthworks done to make the pad a little wider and to have the holes for the retaining wall posts dug because it is hard digging out the back there.

Can you irrigate them?
Absolutely! You can see the lengths running along the hoop house in both of the photos above. They’re long pieces of metal that are screwed into the round high pressure pipe that is giving them their hoop shape. These metals channels provide additional strength to the structure and stops the pressure pipe from moving around.
It’s also the perfect place to attach irrigation lines. We used cable ties to attach the thin irrigation lines to the middle metal channel. We then inserted sprinkler heads on droppers so the water can get down lower to the plants and vegetables. In the downloadable guide we’ll go into more detail about how we irrigated, but the short answer is yes – it can be done very easily.
Is it cheaper to buy a green house kit?
Probably not.
These hoop houses are more affordable than you think to build. For Chris’s build to date including earth works, timber for the retaining wall, metal mesh for the shelves, drainage gravel for the floor, washers & screws – we’re sitting under the $2000 mark. It sounds like a fair bit but this structure is 12m long by 4m wide.
The green house kits that you buy aren’t really designed to last. The quality of metal used for the framing and the shade cloth aren’t worth the postage they charge. Chris and I are all about – if you’re going to build something or add infrastructure to your property – do it once and do it properly. Build something that will last until the kids are old enough to re-build it if need be.
What skills and equipment is needed to build one?
There’s a few things that are really going to make your life easier on this project.
One of them is a star picket dropper which is used to bash the star pickets into the ground. You can usually pick them up for about $50 or less and if you have acreage, you’ll always find a use for one. If you don’t have one and don’t want to buy one – see if a neighbour has one you can borrow in exchange for a 6 pack or some farm fresh produce?
As for any particular skills – if you can use a drill, climb a ladder and use a level, you’ll be able to do this project no drama. Some parts of the build really are a 2 person job, but for the most part, Chris built these on his own while I kept the kids out from under his feet.
Once you have all your materials and equipment gathered, you can usually knock them up in a weekend.

